

This post explains how to set up an AWS Deep Learning Amazon Machine Image, or AWS DLAMI.
An AWS DLAMI is a machine in the cloud that you can access to train and evaluate deep learning models, without having to build a physical computer containing an expensive GPU. Depending on how you configure the DLAMI access, multiple people on your team could share the same DLAMI. You can create relatively inexpensive DLAMIs that have a moderate amount of compute for smaller-scale modeling, or you can create expensive DLAMIs with an immense amount of compute for training large models.
I’ll also cover:
- how to set permissions on your .pem file to enable SSHing into your DLAMI from a Windows computer;
- how to get your DLAMI to access data in S3 buckets even if you have MFA configured for your AWS account;
- how to use the boto3 Python package to access data in S3 buckets.
Step 1: Create an AWS Account
If you don’t already have an AWS account you’ll need to create one.
Step 2: Launch a DLAMI
The official docs for launching a DLAMI are here. There are multiple ways to launch a DLAMI; I’ll go through the second option, “Launch from Amazon EC2 Console” since it is quick and easy.
Step 2a: Open the EC2 Console
Open the EC2 Console and check the upper right-hand corner of your screen to ensure you’re in the AWS region you want to be in.
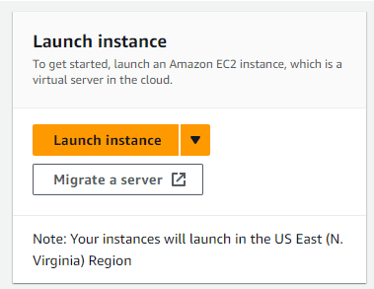
Step 2b: Launch Instance
Click the orange Launch instance button:
Step 2c: Enter a name for your instance
You can name your instance anything you want, e.g. “MyDeepLearningBox.” This name is for your own organizational purposes and doesn’t affect the DLAMI’s functionality.
Step 2d: Select the DLAMI that is right for you
Different DLAMIs support different EC2 instances, so you’ll want to pick a DLAMI that will support the kind of EC2 instance you plan to use. If you’re looking for something that will be less expensive, and you want to use PyTorch with Ubuntu, you can search for “deep learning oss nvidia driver ami gpu” and choose this one:
Deep Learning OSS Nvidia Driver AMI GPU PyTorch 2.2.0 (Ubuntu 20.04)
Supported EC2 instances: G4dn, G5, G6, Gr6, P4, P4de, P5. Release notes: https://docs.aws.amazon.com/dlami/latest/devguide/appendix-ami-release-notes.html
Step 2e: Choose an instance type
There are many instance types to choose from. How do you pick one? It depends on your compute needs.
Different instances have different numbers and sizes of GPUs:
- Amazon P3 Instances have up to 8 NVIDIA Tesla V100 GPUs.
- Amazon P4 Instances have up to 8 NVIDIA Tesla A100 GPUs.
- Amazon P5 Instances have up to 8 NVIDIA Tesla H100 GPUs.
- Amazon G3 Instances have up to 4 NVIDIA Tesla M60 GPUs.
- Amazon G4 Instances have up to 4 NVIDIA T4 GPUs.
- Amazon G5 Instances have up to 8 NVIDIA A10G GPUs.
- Amazon G6 Instances have up to 8 NVIDIA L4 GPUs.
- Amazon G5g Instances have Arm64-based AWS Graviton2 processors.
The instances with more/bigger GPUs are more expensive – like the P5 instances, which are super expensive at about $100 per hour:

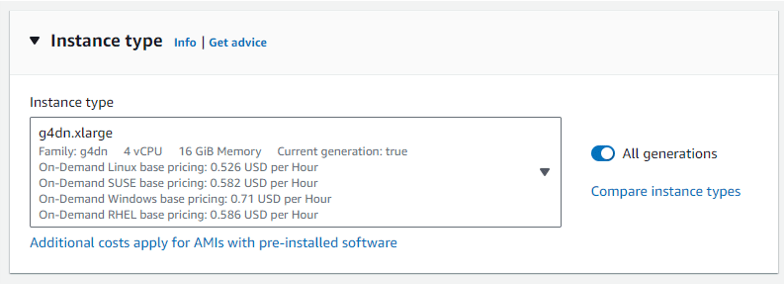
If you’re just getting started, you can choose a G4dn instance, the lowest-cost instance for deep learning:
G4dn instances, powered by NVIDIA T4 GPUs, are the lowest cost GPU-based instances in the cloud for machine learning inference and small scale training. They also provide high performance and are a cost-effective solution for graphics applications that are optimized for NVIDIA GPUs using NVIDIA libraries such as CUDA, CuDNN, and NVENC. They provide up to 8 NVIDIA T4 GPUs, 96 vCPUs, 100 Gbps networking, and 1.8 TB local NVMe-based SSD storage and are also available as bare metal instances. (From the AWS docs)
Here’s a screenshot of the g4dn.xlarge selected as the Instance type, with pricing from June 2024:
There is more documentation here on choosing an instance type.
Step 2f: Create a key pair
You will need to specify a key pair that can be used for logging in to the DLAMI. You can make a new one by clicking “Create new key pair”.

If you intend to use OpenSSH to connect to the DLAMI using this key, choose .pem as the format. Make sure you save the .pem file in a secure place.
Step 2g: Modify the network settings, if desired
It’s a good idea to allow SSH traffic from “My IP”. If you select this option it will automatically determine your IP address. You can add more IP addresses later if you need to let others access the machine as well.
Step 2h: Configure Storage
By default it shows 45 GiB of storage, which for me was all full when starting up the DLAMI for the first time, requiring me to go in afterwards and add more storage. So I recommend making this at least 60 GiB so you have 15 GiB extra for anything you’d like to store on the machine.
Step 2i: Choose Launch Instance

Step 3: Make sure your .pem file has the right permissions
If your locally saved .pem file does not have appropriately restrictive permissions, you will not be able to ssh into the AWS DLAMI because you will get a “bad permissions” error.
If you’re on Linux you can directly “chmod” the .pem file: chmod 600 TheKeyYouMade.pem
If you’re on Windows, the process is a lot more involved. There are several StackOverflow threads about how to set the permissions on the .pem file in Windows so that you can connect to an AWS machine. I tried pretty much all the options, and the only option that worked was using Windows Subsystem for Linux.
Steps:
- Open Windows PowerShell.
- Set up Windows Subsystem for Linux.
- Run “Ubuntu” command to start up WSL (if you’ve installed Ubuntu, otherwise run whatever command is relevant to start up WSL)
- Make an .ssh directory: mkdir .ssh
- Navigate to that directory: cd .ssh
- Copy your .pem file from the Windows file system to the .ssh directory in the WSL file system. If you’re already in the .ssh directory you can do this: cp /mnt/c/Users/YourName/Documents/SomePath/TheKeyYouMade.pem .
- Change the permissions: chmod 600 TheKeyYouMade.pem
Step 4: SSH into the DLAMI
If you don’t already have SSH available on your local machine, you can install OpenSSH.
Finally you can SSH into your DLAMI using this command:
ssh -i TheKeyYouMade.pem ubuntu@X.XXX.XXX.XXX
You’ll replace X.XXX.XXX.XXX with the IP address of your instance. To find this IP address, go to your Instance summary and look under “Auto-assigned IP address” next to “[Public IP]”.
(An aside about the username: the command above uses the username “ubuntu” and is what worked for me. However there are threads online that say that a different username, e.g. “ec2-user”, has been needed to connect to other instances.)
Step 5 (optional): Start conda
If you just type the command “python” in your DLAMI it’ll open a Python interpreter that doesn’t appear to have any packages installed (e.g. “import pandas as pd” won’t work).
You need to start conda to take advantage of all of the Python packages that are pre-installed on the DLAMI. If you just want to see what conda environments are available, you can use the command
conda env list
On the example DLAMI I’ve been describing throughout this article, the conda environment with all the packages installed is called “pytorch.” Run this command to activate the “pytorch” environment:
source activate pytorch
Step 5 (optional): Get data off S3 to train your models using boto3 in Python
If you’re training a custom machine learning model you may have data in an S3 bucket that you want to use for training. How do you get your DLAMI to access this data?
If you have MFA set up for your AWS account, you’ll need to run the get-session-token command while logged in to your DLAMI. It looks something like this:
aws sts get-session-token --serial-number arn:aws:iam::XXXXXXXXXXXX:mfa/ABCDEFG --token-code 123456 --duration 129600
where the token code (the 123456 part) should be substituted out with your current MFA code, and the serial number (the XXXXX ABCDEFG part) should be substituted out with the details of your MFA device.
Here is some relevant documentation about the serial number:
The identification number of the MFA device that is associated with the IAM user who is making the
GetSessionTokencall. Specify this value if the IAM user has a policy that requires MFA authentication. The value is either the serial number for a hardware device (such asGAHT12345678) or an Amazon Resource Name (ARN) for a virtual device (such asarn:aws:iam::123456789012:mfa/user). You can find the device for an IAM user by going to the Amazon Web Services Management Console and viewing the user’s security credentials. (from AWS CLI docs)
Then in Python you can use boto3 to access data in s3 buckets. boto3 comes installed in the conda environment already. boto3 is the AWS Software Development Kit (SDK) for Python and lets Python developers write code to use services like AWS S3 and EC2.
Example usage listing s3 buckets:
import boto3
s3_session = boto3.Session(region_name='us-east-2',
                           aws_access_key_id = KEY_ID,
                           aws_secret_access_key = SECRET,
                           aws_session_token=TOKEN)
s3 = s3_session.resource('s3')

# list your buckets
for bucket in s3.buckets.all():
     print(bucket.name)

# download a file
_ = s3.meta.client.download_file('name-of-your-bucket',
                                 'some-file-on-s3.png',
                                 'whatever-you-want-to-call-it-locally.png')
The KEY_ID, SECRET, and TOKEN will need to be set up for your AWS account. You can either create a root key for your account, or a key for a specific IAM user.
Enjoy your DLAMI!
About the Featured Image
Featured image by author, incorporating a free photo from Krzysztof Kowalik on Unsplash.
Want to be the first to hear about my upcoming book bridging healthcare, artificial intelligence, and business—and get a free list of my favorite health AI resources? Sign up here.
